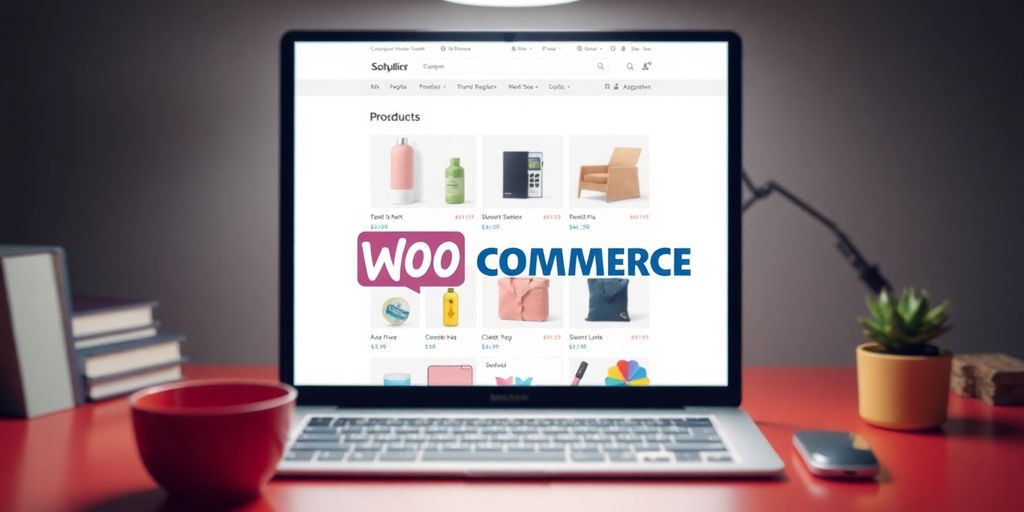
Mastering WooCommerce: A Comprehensive Guide to Add Products Effectively
- Date
So, you’ve got your WooCommerce store up and running, but now it’s time to actually get some products listed. It might seem a bit daunting at first, especially if you’re new to this whole e-commerce thing. But honestly, it’s not that complicated once you break it down. This guide will walk you through everything you need to know to add products effectively, making sure your online shop looks great and is easy for customers to use. We’ll cover the basics of getting started, how to make your product details shine, and even touch on different product types. Let’s get your products out there!
Key Takeaways
- To start adding products, go to the ‘Products’ section in your WordPress dashboard and click ‘Add New Product’.
- Make your product titles and descriptions clear and use bullet points for readability to help customers understand what you’re selling.
- Use good quality images for your products; the main image is what customers see first.
- Organize your products using categories and tags so customers can find what they’re looking for more easily.
- WooCommerce offers different product types like Simple, Grouped, Variable, and External/Affiliate products, so choose the one that fits your item best.
Getting Started With Adding Products

So, you’ve got your WooCommerce store set up, and now it’s time to actually put some stuff up for sale. It’s not as complicated as it might seem at first, honestly. You just need to know where to click and what information to fill in. Let’s break down the initial steps to get your products listed.
Navigate to the Products Section
First things first, you need to get to the right spot in your WordPress dashboard. Once you’re logged in, look for the main menu on the left side. You’ll see an option labeled ‘Products’. Clicking on that will take you to your product management area. It’s like the central hub for everything you’re selling.
Initiate Adding a New Product
After you’ve landed in the ‘Products’ section, you’ll see a list of any products you might have already added (or it’ll be empty if you’re just starting). Right at the top of this page, there’s a prominent button that says ‘Add New’. This is your gateway to listing a new item. Click it, and you’ll be taken to a blank page ready for your product’s details. This is where the magic begins.
Here’s a quick rundown of what you’ll see on the ‘Add New Product’ screen:
- Product Name: This is the main title of your item. Make it clear and descriptive.
- Product Description: This is where you’ll write all the details about your product. Think about what a customer would want to know.
- Product Data Box: This is a big section below the description where you’ll select the product type and set prices, inventory, shipping, and more.
- Publish Button: Located on the right side, this is what you’ll click when you’re ready for your product to go live.
Don’t feel overwhelmed by all the fields. You can start with the basics and come back to add more details later if needed. The most important thing is to get the core information in so customers can see what you’re selling.
Crafting Compelling Product Details
So, you’ve got your product ready to go, but how do you make sure people actually want to buy it? It all comes down to the details. This is where you convince someone that your product is exactly what they need. Let’s break down how to make your product listings shine.
Optimize Product Titles and Descriptions
Your product title is the first thing people see, so make it count. Think about what customers would actually type into a search bar. Instead of just "T-Shirt," try something like "Men’s Cotton Crew Neck T-Shirt – Blue, Size Large." It’s more specific and tells people exactly what they’re getting. The same goes for descriptions. Don’t just list features; explain the benefits. How does this product make the customer’s life better?
For the main description, aim for clarity and detail. Break down the information into digestible chunks. You can use bullet points for key features or specifications. This makes it easy for shoppers to quickly scan and find the information they need. Remember, a good description isn’t just about what the product is , but what it does for the customer.
A well-written short description can make a big difference. It’s often the first bit of text people read after the title and price, so make it punchy and informative. Think of it as a teaser for the full description below.
Enhance Readability with Bullet Points
Nobody wants to read a giant wall of text. Bullet points are your best friend here. They break up information, making it easier to read and understand. Use them for:
- Key features and benefits
- Technical specifications (like dimensions or materials)
- What’s included in the package
- Care instructions
Here’s a quick example of how you might use bullet points for a t-shirt:
- 100% Premium Cotton
- Soft, breathable fabric
- Machine washable
- Tagless neck label for comfort
- Available in multiple colors
This makes it super easy for someone to see if the product meets their needs without having to hunt for the information. It’s all right there, clear as day. You can even use shortcodes to display products in specific ways, like showing your [best_selling_products] in a neat grid. This helps customers find popular items quickly.
Showcasing Your Products Visually
Alright, so you’ve got your product details all sorted, but now it’s time to make people actually want to buy it. This means getting your product images right. It’s not just about slapping any old photo up there; it’s about making a good first impression.
Select and Upload Your Main Product Image
This is the big one, the main photo that shows up everywhere – on your shop page, category pages, and of course, the product page itself. You want this image to be clear, well-lit, and show the product from its best angle. Think about what would catch your eye if you were browsing. A blurry or poorly lit photo? Nope. A crisp, attractive image? Yes, please.
It’s a good idea to make sure all your product images are the same size before you upload them. You can use an image editor to set up a template for this, which really helps keep things looking uniform across your store. Consistency makes your shop look more professional.
Utilize Product Images Effectively
Beyond that main image, you can add more photos to give customers a fuller picture. Think about different angles, close-ups of important features, or even the product in use. This helps people feel more confident about what they’re buying.
- Add multiple images: Use the ‘Product Gallery’ section to upload additional photos.
- Show different angles: Include shots from the front, back, sides, and any unique details.
- Context is key: If it’s clothing, show it on a model. If it’s furniture, show it in a room setting.
- Close-ups matter: Highlight textures, materials, or specific functionalities.
Don’t underestimate the power of good visuals. Customers can’t touch or feel your products online, so your images have to do the heavy lifting. They’re not just pictures; they’re your virtual salespeople.
WooCommerce also lets you use shortcodes to display products in different ways. For example, you can use [products] to show a selection of items, maybe from a specific category like [products category="t-shirts"] . This is a neat way to organize and present your items without needing to be a coding whiz. You can even control how many products show up and how they’re arranged, like [products limit="8" columns="4"] to display eight items in four columns. It’s all about making your store look good and work well for shoppers.
Organizing Products for Customer Convenience
Making it easy for customers to find what they’re looking for is a big deal. If your shop feels like a jumbled mess, people might just leave. That’s where good organization comes in. We’ll look at categories and tags, which are your main tools here.
Assign Product Categories
Think of categories like the main aisles in a grocery store. They’re broad groupings that help customers narrow down their search quickly. For example, you might have categories like "Electronics," "Clothing," or "Home Goods." When you add a new product, you’ll want to assign it to the most fitting category. This helps customers browse your store more efficiently. You can create new categories on the fly or manage them all from one place in your WordPress dashboard. Having a clear category structure is key to a good shopping experience.
Implement Relevant Product Tags
Tags are more specific than categories. They’re like the specific shelves or sections within those aisles. If "Clothing" is a category, tags could be "t-shirts," "jeans," "summer collection," or "organic cotton." Customers can use these tags to find very specific items. For instance, someone looking for a "blue, cotton t-shirt" could potentially filter by both the "t-shirts" tag and a color attribute. Using tags effectively can really improve your site’s searchability and help customers discover products they might not have found otherwise. It’s a good idea to use a consistent set of tags across your products. You can see how to display products using tags with shortcodes like [products tag="sale"] to show items marked with a specific term. This is a great way to manage your online store without needing to code. SEO strategies for WooCommerce stores can also help customers find these tagged products through search engines.
Proper organization isn’t just about making your shop look tidy; it’s about guiding your customers smoothly from browsing to buying. Well-defined categories and descriptive tags work together to create a user-friendly environment that encourages exploration and repeat visits.
Understanding WooCommerce Product Types
So, you’ve got your products ready to go, but how do you tell WooCommerce what they are? It’s not just about slapping a name and a price on it. WooCommerce has different ways to list your items, and picking the right one makes a big difference for your customers and how you manage things. Let’s break down the main types you’ll run into.
Simple Products Explained
This is your bread-and-butter product. Think of a single item that doesn’t have any options like size, color, or material. It’s just one thing, sold as is. A plain coffee mug, a specific book, or a single pair of socks without any variations would fit here. It’s the most basic setup and perfect for straightforward items. You just need a name, description, price, and maybe an image. Easy peasy.
Grouped Products Overview
Now, a grouped product isn’t a bundle that’s sold together for a discount. Instead, it’s a collection of related simple products that customers can choose from individually. Imagine a set of dining chairs where you sell them individually, but you want to show them as a group. A customer could then pick one chair, or two, or all four. It’s a way to present related items without forcing a purchase of the whole set. You link existing simple products to create the group.
Variable Products Explained
This is where things get a bit more interesting. Variable products are for items that come in different versions. Think t-shirts that have various sizes (Small, Medium, Large) and colors (Red, Blue, Green). For each combination of size and color, you can set a different price, stock level, and even image. You’ll define attributes like ‘Size’ and ‘Color’, then create ‘variations’ for each possible combination. This is super handy for clothing, electronics, or anything with options. Setting these up correctly is key to a good customer experience.
External/Affiliate Products Explained
Ever wanted to sell something on your site that you don’t actually stock or handle yourself? That’s where external or affiliate products come in. When a customer clicks the button on your site (which you can customize, maybe to ‘Buy Now’ or ‘Check Price’), they’re sent to another website to complete the purchase. This is great for affiliate marketing or if you’re dropshipping and want to link directly to a supplier’s page. You’re essentially acting as a referrer.
Choosing the right product type helps manage inventory, display options clearly, and guide customers through their buying journey. It’s about making your store work for you and your shoppers.
Publishing and Managing Your Listings
Alright, you’ve put in the work crafting your product details and making sure everything looks good. Now it’s time to get it out there and keep it organized. This is where you actually make your product live on your store.
Finalizing Product Information
Before you hit that publish button, take a moment to double-check everything. You’ve got your main product image, categories, tags, and all those details sorted. It’s also a good time to look at the other tabs you might have filled out. The ‘General’ tab is where you set your prices, including any sale prices if you’re running a promotion. Make sure the tax status is correct too. The ‘Inventory’ tab is super important for keeping track of stock. You can set up SKUs, manage stock quantities, and even allow backorders if needed. Don’t forget the ‘Shipping’ tab for physical items; this is where you’ll put in weight and dimensions, and set up shipping classes if you group products for different rates. The ‘Linked Products’ tab lets you add upsells and cross-sells to encourage more sales, and the ‘Attributes’ tab is where you define things like color or size options.
Remember, a well-organized product listing isn’t just good for your customers; it helps search engines find you too. A clear, concise short description can make a big difference in how often your product appears in searches.
Publishing Your Product
Once you’re happy with all the details, making your product live is pretty straightforward. Just find the ‘Publish’ button, usually located in the top-right corner of the product editing screen. Click it, and your product will be visible to everyone browsing your store. It’s that simple!
Duplicating Product Drafts
Got a lot of similar products to add? Don’t reinvent the wheel every time. WooCommerce makes it easy to reuse your work. After you’ve published a product or saved it as a draft, you can create a copy. Look for a link that says ‘Copy to a new draft’ or something similar, usually found in the sidebar near the ‘Publish’ button. Clicking this will create an exact duplicate of your current product, ready for you to tweak the details for your next item. This saves a ton of time, especially when you have many variations of a single product, like different colors or sizes. It’s a smart way to manage your online store efficiently.
Wrapping Up Your Product Additions
So, you’ve learned how to get your products listed in WooCommerce. It might seem like a lot at first, but breaking it down makes it manageable. Remember to give your products clear titles and descriptions, using keywords that help people find them. Picking the right product images is also a big deal – make them look good and show off what you’re selling. Don’t forget to sort your products with categories and tags so customers can easily browse your shop. Once everything looks right, hit that publish button! And hey, if you need to add more items later, just copy your existing product setup to save time. Keep practicing, and soon adding products will feel like second nature.
Frequently Asked Questions
What exactly is WooCommerce?
Think of WooCommerce as a special add-on for WordPress websites. It’s like a toolkit that lets you turn your website into an online shop where you can sell all sorts of things, like physical items or digital downloads.
How do I add new items to my online store?
You can add items one by one by going to the ‘Products’ section in your WordPress site and clicking ‘Add New Product.’ If you have a lot of items, you can also add them all at once by uploading a file.
Why are product titles and descriptions so important?
Your product’s title and description are like its first impression. They need to be clear and catchy so customers know what they’re buying. Using good keywords here also helps people find your products when they search online.
What’s the deal with product images?
Product images are super important because they show customers what your item looks like. You need a main picture that clearly shows the product’s best features. Having extra pictures can also help shoppers see everything they need to know.
How do categories and tags help my store?
Categories and tags are like labels for your products. They help you keep your items organized and make it easier for customers to find what they’re looking for on your website. Good organization means happier shoppers!
What are the different types of products I can sell?
WooCommerce lets you sell different kinds of items. There are ‘Simple Products’ for basic items, ‘Grouped Products’ for sets of items, ‘Variable Products’ for things that come in different options like size or color, and ‘External/Affiliate Products’ for items you recommend from other stores.
