Mastering Variable Products in WooCommerce: A Comprehensive Guide
- Date
So, you’ve got an online store and you’re using WooCommerce. That’s great! But maybe you’re selling things like t-shirts that come in different colors and sizes, or maybe phones with various storage options. Trying to list each single option as a separate product can get messy, fast. That’s where variable products in WooCommerce come in. They let you group all those different choices under one main product listing. It makes things way simpler for you and much easier for your customers to find exactly what they want. This guide will walk you through how to set them up and make them work for your business.
Key Takeaways
- A variable product in WooCommerce lets you offer multiple options, like size or color, under a single product page.
- Attributes are the building blocks for creating these variations; you need to set them up first.
- Each variation can have its own price, stock level, image, and other specific details.
- Using plugins can help you make these variations look better, like with color swatches, and manage them more easily.
- Regularly checking and updating your variable product listings, especially stock and pricing, is important for a good customer experience.
Understanding Variable Products in WooCommerce
So, you’re looking to sell products that come with options, right? Like t-shirts in different colors and sizes, or maybe phones with varying storage capacities. That’s exactly what variable products are for in WooCommerce. They let you offer a single product listing but give customers a bunch of choices to pick from. It’s a really smart way to manage inventory and present a lot of options without cluttering your shop. Basically, if your product has attributes that change how it looks, functions, or is priced, it’s probably a variable product.
What Constitutes a Variable Product?
A variable product is a single WooCommerce product entry that can have multiple child products, each with its own unique settings. These child products are called variations. Think of it like a parent product that holds all the possible versions of an item. For example, a basic t-shirt product might have variations for small, medium, and large sizes, and then further variations for colors like red, blue, and green. Each of these combinations (e.g., a small red t-shirt) becomes a distinct variation that a customer can select and purchase.
The Role of Attributes in Product Variations
Attributes are the backbone of variable products. They are the characteristics that differentiate one variation from another. You can create attributes like ‘Color’, ‘Size’, ‘Material’, or ‘Capacity’. Once you define these attributes, you can then assign specific terms to them, such as ‘Red’, ‘Blue’, ‘Green’ for the ‘Color’ attribute, or ‘Small’, ‘Medium’, ‘Large’ for the ‘Size’ attribute. WooCommerce uses these attributes and their terms to build the dropdown menus or swatches that customers see on the product page, allowing them to choose their desired combination. It’s important to set these up correctly because they directly influence how customers interact with and select your products. You can create attributes globally to reuse them across multiple products, which saves a lot of time. Check out the WooCommerce Attributes Page for more details on managing these.
Examples of Variable Products in E-commerce
Variable products are everywhere online. Clothing stores are a prime example, offering shirts, pants, and dresses in various sizes and colors. Electronics retailers sell smartphones with different storage options and colors. Furniture shops might offer sofas in different fabric types and leg finishes. Even something like a coffee shop could use variable products for drinks, allowing customers to choose size, milk type, and added flavor shots. Essentially, any product that has distinct options that a customer can select before buying is a good candidate for a variable product setup. This flexibility makes the shopping experience much more personalized and can lead to happier customers and more sales.
Setting Up Your First Variable Product
Alright, let’s get down to business and create your very first variable product in WooCommerce. It might sound a bit technical, but honestly, it’s pretty manageable once you break it down. Think of it like building with LEGOs – you’ve got different pieces (attributes) that you combine to make something unique.
Creating Global Attributes for Reusability
Before you even touch a product, it’s smart to set up your attributes. These are the characteristics that will define your variations, like ‘Color’ or ‘Size’. Doing this globally means you can use them across multiple products later, saving you a ton of time. Head over to Products → Attributes in your WordPress dashboard. You’ll see a spot to add a new attribute. Give it a name, like ‘Color’, and a slug (which is just a URL-friendly version, so ‘color’ works fine). You can also choose the type, but for most things, the default is good. Click ‘Add Attribute’, and boom, it’s there. Now, you need to add the actual values for that attribute. Click ‘Configure Terms’ next to your new attribute. Here, you’ll add things like ‘Red’, ‘Blue’, ‘Green’ for your ‘Color’ attribute. Again, give each a name, slug, and maybe a label. This is how customers will see the options. It’s really important to get these right the first time.
Assigning Attributes to a New Product
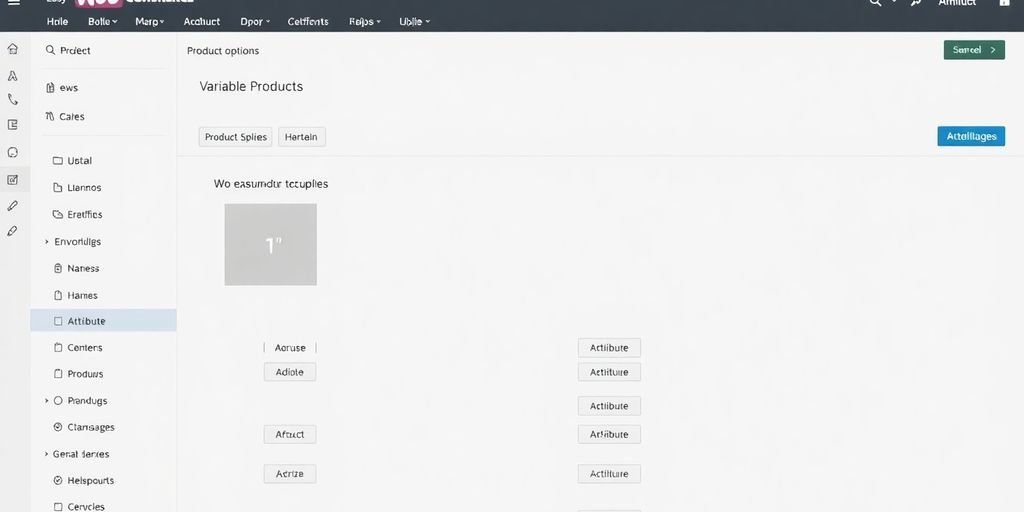
Now that you have your attributes ready, let’s add them to a product. Go to Products → Add New. Give your product a title and description as usual. Scroll down to the ‘Product data’ section. Make sure ‘Variable product’ is selected from the dropdown. You’ll see a new tab appear called ‘Attributes’. Click on that. You’ll see a dropdown menu where you can select the attributes you just created, like ‘Color’ or ‘Size’. Choose the ones you need and click ‘Add’. Now, for each attribute you’ve added, you need to tell WooCommerce which values apply to this specific product. For ‘Color’, you might check ‘Red’, ‘Blue’, and ‘Green’. For ‘Size’, you might check ‘Small’, ‘Medium’, and ‘Large’. You can also choose to use this attribute for variations. Once you’re happy, click ‘Save attributes’. This is a key step in setting up your WooCommerce product .
Defining Product Variations from Attributes
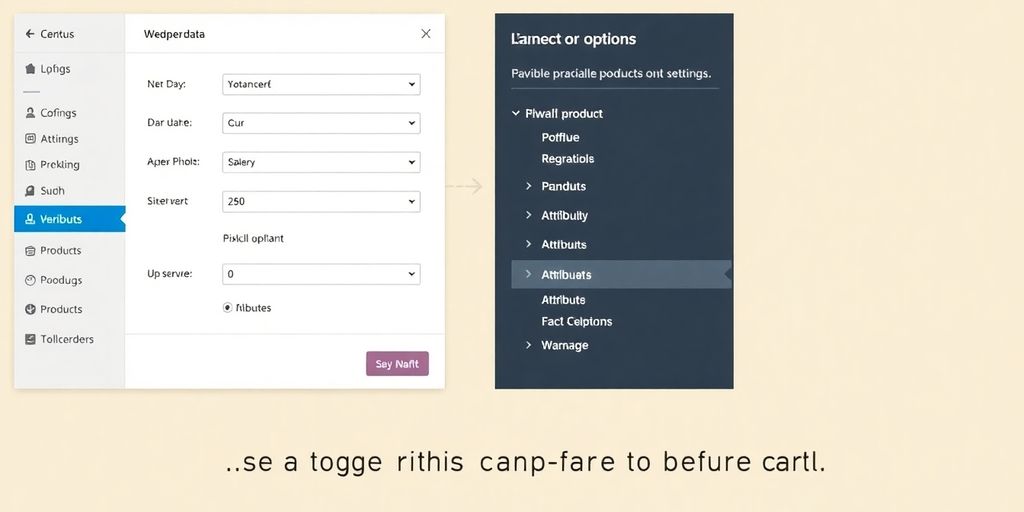
This is where the magic happens. With your attributes assigned, go to the ‘Variations’ tab in the ‘Product data’ section. You have two main options here: you can either ‘Add variation’ manually, picking each combination of attributes one by one, or you can click ‘Create variations from all attributes’. The second option is usually way faster if you have a lot of combinations. WooCommerce will then create every possible mix of your attributes (e.g., Red – Small, Red – Medium, Blue – Small, etc.). For each variation that gets created, you can click on it to expand and set specific details. This is where you’ll set the price, SKU, stock quantity, weight, dimensions, and even assign a unique image for that specific variation. If you don’t set a price for a variation, it won’t be purchasable. So, make sure every variation you want to sell has a price. It’s a good idea to review these settings carefully before moving on.
Here’s a quick look at what you can set per variation:
- Price : The cost for this specific combination.
- SKU : A unique identifier for this variation.
- Stock status : Whether it’s in stock, out of stock, or on backorder.
- Image : A specific picture for this variation (like a red shirt for the ‘Red’ variation).
- Weight & Dimensions : If shipping varies by size or weight.
- Downloadable/Virtual : If applicable.
Remember, each variation is essentially its own mini-product within the main variable product. Getting these details right is what makes the customer experience smooth and prevents confusion.
Managing Individual Product Variations
Once you’ve got your attributes set up for a variable product, the next big step is actually managing each individual variation. This is where you fine-tune the specifics for each option your customers can choose from, like a specific size and color combination of a t-shirt.
Setting Unique Prices and SKUs for Variations
Every single variation can have its own price and SKU. This is super important for keeping track of inventory and for accurate sales reporting. For example, a premium color might cost a bit more, or a larger size could have a slightly higher price tag. You’ll find these fields right within the variation settings. Just click to expand a variation, and you can input the specific price and SKU. It’s a good idea to use a consistent SKU naming convention so you can easily identify each variation later on. This helps immensely when you’re looking at sales data or need to restock a particular item.
Managing Stock Levels for Each Variation
Keeping track of stock for each variation is key to avoiding overselling. If you have 50 blue shirts in medium and 10 red shirts in large, you need to reflect that accurately. In the variation settings, there’s a section for stock management. You can choose to manage stock at the variation level, which lets you input the exact quantity available for that specific option. If a variation goes out of stock, WooCommerce can automatically hide it from the front end, which is a lifesaver. You can also use the bulk edit feature to update stock for multiple variations at once, saving you a ton of time.
Assigning Specific Images to Product Options
Visuals are a huge part of selling online, and variable products are no exception. You can assign a unique image to each variation. So, when a customer selects a red shirt, the product image updates to show the red shirt. This makes it so much easier for shoppers to see exactly what they’re getting. To do this, just click on a variation in the settings and upload the corresponding image. Make sure your images are clear and show the product well. This small detail can really make a difference in customer satisfaction and can even help boost sales by making the product more appealing. It’s a good practice to have a default image set for the product itself, which shows up before any specific variation is chosen. This helps customers get a general idea of the product before they start customizing their selection. You can find great tips on improving your online store’s overall customer experience on ecommerce platforms .
Managing individual product variations might seem like a lot of detail at first, but it’s really about giving your customers clear choices and yourself accurate data. Getting these settings right means fewer customer service issues down the line and a smoother shopping experience for everyone involved. It’s worth the effort to make sure each option is perfectly represented.
Enhancing the Variable Product Experience
Making your variable products easy and enjoyable to shop for is key to boosting sales. It’s not just about having options; it’s about presenting them in a way that makes sense and looks good. Let’s talk about a couple of ways to really make your variable products shine.
Implementing Variation Swatches for Visual Appeal
Sometimes, just seeing the options makes all the difference. Instead of a plain dropdown menu, imagine clicking on a little color square or a small image to pick the shade you want. That’s what variation swatches do. They replace those boring text lists with something much more engaging.
- Color Swatches: Perfect for clothing or anything with different colors. You show a small circle of the actual color.
- Image Swatches: Great for showing different patterns or styles. You can use tiny versions of the product image.
- Text/Label Swatches: Useful for things like sizes (S, M, L) or materials (Cotton, Wool). You just display the text clearly.
Using swatches makes it way easier for customers to see what they’re choosing, especially when there are many options. It cuts down on confusion and makes the whole process feel more intuitive. It’s a small change that can really improve how people interact with your products.
Utilizing Custom Product Designers
For some businesses, like those selling custom t-shirts, mugs, or even furniture, offering a few pre-set variations isn’t enough. Customers might want to mix and match more, or even design something unique. This is where custom product designer tools come in. These are often plugins that let your customers play around with different elements, add text, change colors, and see a live preview of their creation.
Think about a customer wanting a specific design on a hoodie. They might want to choose the hoodie color, the text color, the font, and where the design goes. A product designer tool lets them do all of that right on your site, making the purchase feel personal and special.
This level of customization can be a huge draw for customers looking for something truly unique. It turns a simple purchase into an interactive experience.
Bundling Variable Products for Increased Sales
Bundling is a smart way to encourage customers to buy more. You can group related variable products together and offer them as a package, often at a slightly better price than buying each item separately. For example, if you sell cameras, you could bundle a camera body with a specific lens and a memory card. The customer can then choose the exact memory card size they need, making the bundle still flexible.
- Complementary Items: Pair products that naturally go together, like a coffee maker with coffee beans and filters.
- Themed Packages: Create bundles for specific occasions or uses, like a "starter kit" for a hobby.
- Discounted Sets: Offer a small discount when multiple items are purchased together as a bundle.
This approach not only increases the average order value but also simplifies the shopping experience for customers who might be looking for a complete solution. It’s a win-win: customers get convenience and value, and you get more sales. You can find plugins that help manage these complex product bundles effectively.
Advanced Techniques for Variable Products
Once you’ve got the basics down for variable products, it’s time to explore some more advanced strategies to really make them shine and boost your sales. This isn’t just about listing options; it’s about smart selling.
Leveraging Dynamic Pricing for Variations
Dynamic pricing can be a game-changer for variable products. Instead of a flat price for all options, you can adjust prices based on specific attributes. For instance, a premium color might cost a bit more, or a larger size could have a slightly higher price point. This makes the pricing feel more accurate and fair to the customer. You can set these rules up within WooCommerce, often with the help of a plugin, to automatically adjust prices based on the customer’s selection. It’s a great way to manage perceived value and ensure your pricing reflects the actual cost or desirability of each variation.
Importing and Exporting Variable Products via CSV
Dealing with a lot of variable products manually can get tedious. That’s where CSV import and export come in handy. You can prepare a spreadsheet with all your product details, including variations, attributes, prices, and stock levels, and then upload it directly into WooCommerce. This is a lifesaver for bulk updates or when migrating products from another platform. Similarly, you can export your existing variable products to a CSV file to review, edit, or back up your data. Getting the CSV format right is key, so make sure you understand how to structure it for WooCommerce. This method is a huge time-saver for managing large inventories and is a core part of setting up variable products in WooCommerce .
Troubleshooting Common Variable Product Issues
Even with the best setup, you might run into a few snags. Common problems include variations not showing up, incorrect pricing, or stock issues. Sometimes, a conflict with another plugin or theme can cause unexpected behavior. Checking your attribute setup is usually the first step – make sure all terms are correctly assigned. If variations aren’t displaying, ensure you’ve generated them from your attributes. For stock problems, double-check that stock management is enabled for each individual variation and that the quantities are accurate. If you’re still stuck, looking at your site’s health or temporarily disabling plugins can help pinpoint the cause. It’s often a simple fix once you know where to look.
Optimizing Your Variable Product Listings
So, you’ve put together your variable products, got all the attributes and variations sorted. That’s awesome! But we’re not quite done yet. Making sure your listings are top-notch is key to getting those sales. It’s like making sure your shop window looks amazing – you want people to stop and look, right?
Ensuring Accurate Stock Updates
This is a big one. Nothing frustrates a customer more than ordering something that’s actually out of stock. You really need to keep a close eye on your inventory levels for each variation. If you sell a blue t-shirt in a medium, and you only have three left, make sure that’s what the system says. WooCommerce lets you manage stock per variation, so use it! It saves a lot of headaches down the line. If you’re selling a lot of items, maybe look into plugins that can help automate this, or at least give you better alerts. Keeping your stock info correct is pretty much non-negotiable for a smooth operation.
Conducting Final Reviews Before Publishing
Before you hit that ‘Publish’ button, take a moment. Go through each variation like you’re a customer. Click on the different colors, sizes, or whatever options you have. Does the right image show up? Is the price correct for that specific combination? Does the description make sense for that particular option? A quick double-check can catch silly mistakes that might cost you sales. It’s easy to get excited and rush, but that final look-over is super important. Think of it as proofreading your work before you hand it in.
Utilizing Plugins for Enhanced Functionality
While WooCommerce itself is pretty powerful, there are tons of plugins out there that can really make your variable products shine. Need better visual swatches instead of just dropdowns? There’s a plugin for that. Want to let customers customize their product even further? Yep, plugins can help. These tools can add features that make your products more appealing and easier for customers to choose from. It’s worth looking into what’s available to see if any can simplify your process or improve the customer experience on your site. You might find something that makes managing your variable product descriptions a breeze.
Wrapping It Up
So, you’ve learned how to handle those tricky variable products in WooCommerce. It’s all about giving your customers choices, whether that’s different colors, sizes, or whatever else makes your product unique. We covered setting up attributes, creating the actual variations, and even making sure the right pictures show up for each option. It might seem like a lot at first, but once you get the hang of it, it really makes your online store much more user-friendly. Just remember to double-check everything, especially prices and stock, before you hit publish. Happy selling!
Frequently Asked Questions
What exactly is a variable product in WooCommerce?
A variable product in WooCommerce is like a product that comes in different flavors or styles. Think of a t-shirt that you can buy in red, blue, or green, and also in small, medium, or large sizes. Each of these combinations (like a red, small t-shirt) is a variation of the main product.
How do I set up different options (variations) for a product?
To create variations, you first need to set up ‘attributes’ for your product. These are the options customers can choose from, like ‘color’ or ‘size.’ Then, you go to the ‘Variations’ tab for that product and tell WooCommerce which combinations of attributes you want to offer. You can even set different prices, stock levels, or images for each variation.
Can each product variation have its own price and stock count?
Yes, you can! For each specific variation (like a blue, medium shirt), you can set its own unique price, stock quantity, and even upload a special picture. This helps customers see exactly what they’re getting and ensures you don’t sell items you don’t have.
How can I add many variable products at once?
You can import variable products using a CSV file. This is a spreadsheet file where you list all your products and their variations. You’ll need to format the file correctly, telling WooCommerce which attributes belong to which variations. Then, you upload this file through WooCommerce’s import tool.
Is there a way to create attributes that I can use for multiple products?
While you can add attributes directly to a product, it’s often better to create ‘global’ attributes first. You do this in the ‘Attributes’ section of WooCommerce. This way, you can reuse the same attributes (like ‘color’ with options ‘red’, ‘blue’, ‘green’) for many different products, saving you time.
Can I make the product options look nicer than just a dropdown list?
Yes, you can! Plugins can add cool features like ‘variation swatches,’ which show color circles or small images instead of plain text dropdown menus. This makes it much easier and more attractive for customers to pick their desired options, like seeing a red swatch to choose the red shirt.
