Mastering Your WooCommerce Order Status: A Comprehensive Guide
- Date
Running an online shop can be a lot. You get orders, you pack them, you ship them. But keeping track of everything? That’s where knowing your WooCommerce order status comes in handy. It’s like a roadmap for each sale. This guide will walk you through how to use these statuses to make your life easier and keep your customers happy.
Key Takeaways
- Understanding the default order status in WooCommerce helps manage the order lifecycle.
- The Orders dashboard is your central hub for viewing and managing all customer orders.
- Editing individual order details and using order notes are important for clear communication.
- Properly marking orders (Processing, Complete, etc.) streamlines fulfillment.
- Customizing order statuses can better fit your specific business needs.
Understanding WooCommerce Order Statuses
Think of order statuses in WooCommerce as the life stages of a customer’s purchase. They’re super important for keeping track of where everything is at, from the moment someone clicks ‘buy’ all the way to when they actually get their stuff. It’s not just about knowing if an order is done; it’s about managing expectations, both for you and your customer.
The Role of Order Statuses in E-commerce
Order statuses are basically the backbone of your fulfillment process. They tell you what needs to happen next. Are you waiting for payment? Is the item being packed? Has it shipped? Each status is a little flag telling you the current situation. This clarity helps prevent mix-ups and keeps your operations running smoothly. Without them, you’d be flying blind, trying to remember which order is which. It’s like having a to-do list that updates itself as you work through it.
Default Order Statuses in WooCommerce
WooCommerce comes with a set of built-in statuses that cover most common scenarios. You’ll see these pop up regularly:
- Pending Payment: The order has been placed, but payment hasn’t been confirmed yet. Maybe the customer is still on the checkout page, or the payment gateway is taking a moment.
- Processing: Payment is confirmed, and you’re getting the order ready to ship. This is where the packing and handling happen.
- On Hold: Similar to pending payment, but this might be used if you need more information from the customer or if there’s a specific reason to pause the order.
- Completed: The order has been fulfilled and delivered. Hooray!
- Canceled: The order was called off, either by you or the customer.
- Refunded: The customer returned the item, and you’ve issued a refund.
- Failed: The payment didn’t go through. This could be due to a declined card or other payment issues.
Why Order Statuses Matter for Your Business
Getting a handle on these statuses is more than just good organization; it directly impacts your business. For starters, it helps you manage your inventory better. If an order is ‘Processing,’ you know those items are spoken for. It also helps with customer service. Imagine a customer asking where their order is. If you can quickly check its status, you can give them an accurate update, which makes them feel looked after. Plus, keeping statuses accurate helps you spot trends, like if a particular payment method is often failing, which could point to a problem you need to fix.
Keeping your order statuses up-to-date is a simple yet powerful way to maintain control over your sales process. It reduces errors, improves efficiency, and ultimately leads to happier customers who are more likely to return.
Navigating the WooCommerce Orders Dashboard
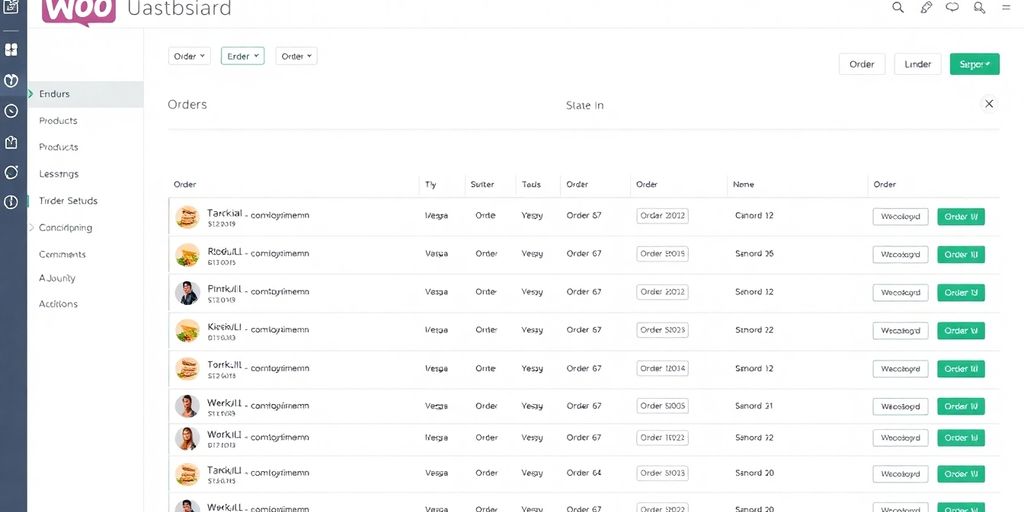
Alright, let’s talk about the heart of your online store’s operations: the WooCommerce Orders dashboard. This is where all the magic (and sometimes the chaos) of customer purchases comes together. Think of it as your command center for everything that happens after someone clicks ‘buy’.
Accessing Your Orders Page
Getting to this vital section is pretty simple. Just log into your WordPress admin area. On the left-hand menu, you’ll see ‘WooCommerce’. Click on that, and then select ‘Orders’. Boom! You’re there. It’s like finding the backstage pass to your entire sales operation.
Key Information Displayed for Each Order
Once you’re on the Orders page, you’ll see a list of all your customer orders. Each row gives you a snapshot of what’s going on. You’ll typically see:
- Order Number: A unique ID for each sale.
- Customer Name: Who bought what.
- Date: When the order came in.
- Status: This is a big one – it tells you where the order is in the fulfillment process (like ‘Processing’ or ‘Completed’).
- Billing: The customer’s billing details.
- Total: The final amount of the order.
- Actions: Quick links to manage the order.
It’s really important to get familiar with these columns because they’re your first line of defense in keeping track of everything.
Customizing Your Orders View
Now, the default view might not show you exactly what you need. No worries, WooCommerce lets you tweak this. Look for ‘Screen Options’ at the top right of the Orders page. Click it, and a little panel drops down. Here, you can check or uncheck boxes to decide which columns you want to see. You can also adjust how many orders appear on a single page. Just remember to hit ‘Apply’ after you’ve made your changes. This way, you can tailor the dashboard to show you only the most relevant information at a glance, saving you time and clicks.
You can also filter your orders. Need to see only orders from last week? Or maybe just orders that are ‘On Hold’? The filter options, usually found above the order list, let you sort by date, status, customer, and more. This is super handy for zeroing in on specific tasks or orders that need your immediate attention.
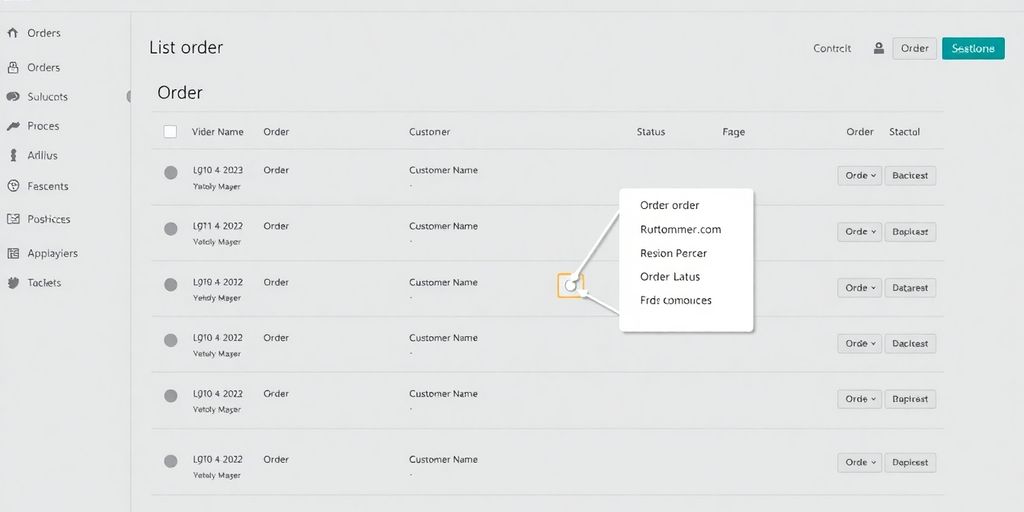
Managing Individual Orders Effectively
When you get an order, it’s not just a number; it’s a customer who’s waiting. So, knowing how to handle each one is pretty important for keeping your shop running smoothly and your customers happy. Let’s break down how to manage these orders individually.
Viewing Detailed Order Information
Once an order comes in, you’ll want to see all the specifics. Head over to your WordPress dashboard, then click on ‘WooCommerce’ and then ‘Orders’. You’ll see a list of all your orders. Clicking on an order number or the customer’s name will open up a detailed view. Here, you can see everything: what they bought, how much they paid, their shipping and billing details, and any notes they might have left. It’s like a customer’s personal order history right there.
Editing Order Details and Status
Sometimes, things need a little tweak. Maybe a customer called to change their shipping address, or you need to adjust a product quantity. You can do this from the single order page. However, you can only edit certain details if the order status is ‘On Hold’ or ‘Pending Payment’. Once an order is processing or completed, making changes becomes more restricted to avoid messing up fulfillment. You can update the order status here too, moving it along the fulfillment pipeline.
Utilizing Order Notes for Communication
Order notes are super handy for keeping track of what’s happening with an order, especially if you have a team or if you need to remember specific customer requests. There are two types of notes:
- Customer Notes: These are visible to the customer. You might use this to confirm a special request or provide an update they need to see.
- Internal Notes: These are just for you and your team. You can use them to jot down details about a phone call, a stock issue, or any internal action taken.
Think of them as a little diary for each order, helping everyone stay on the same page. It’s a simple way to add context without cluttering up other communication channels.
Streamlining Order Fulfillment Processes
Getting orders out the door efficiently is the name of the game, right? It’s how you keep customers happy and your business moving. WooCommerce gives you the tools to manage this, but you’ve got to know how to use them. Let’s break down how to handle those orders once they land in your system.
Marking Orders as Processing and Complete
When an order comes in, it usually starts as ‘Pending Payment’ or ‘On Hold’. The first real step in fulfillment is moving it to ‘Processing’. This tells your team (or just you!) that the payment is good and it’s time to get the product ready. You’ll see this status change right in your orders list. Once you’ve actually shipped the item and maybe added a tracking number, you’ll want to mark it as ‘Completed’. This is a big one for customers; it means their order is on its way. It’s a simple click, but it makes a difference in how customers perceive your service.
Handling On Hold and Pending Payment Orders
‘On Hold’ orders are a bit like ‘Pending Payment’ but might have a specific reason, like needing manual payment confirmation or a stock issue. You’ll need to check why it’s on hold and then update the status accordingly. If it’s a payment issue, you might need to contact the customer. ‘Pending Payment’ means the order is in, but the money hasn’t cleared yet. You can’t really start fulfilling until that payment is confirmed. Sometimes, it’s best to just let these sit until payment comes through, or if it’s been too long, you might cancel them.
Managing Canceled and Refunded Orders
Things happen, and sometimes orders need to be canceled or refunded. If a customer cancels, or you have to cancel due to an issue, marking it as ‘Canceled’ is important. This removes it from your active fulfillment queue. Refunds are similar. When you process a refund, you’ll want to update the order status to ‘Refunded’. This keeps your records clean and shows the customer that their money is being returned. It’s all about keeping your order book accurate and transparent. For a deeper look at managing your entire workflow, check out this guide on WooCommerce order management .
Customizing Order Statuses for Your Business
Sometimes, the standard order statuses that come with WooCommerce just don’t cut it for your specific business needs. Maybe you have a unique production process, or perhaps you offer specialized services that require more detailed tracking. That’s where custom order statuses come in handy. They let you map out the exact journey of an order, from start to finish, in a way that makes sense for your operations.
When Default Statuses Aren’t Enough
Think about it. WooCommerce gives you "Processing" and "Completed," but what if your process involves several steps between those two? For example, if you sell custom-built furniture, you might need statuses like "Design Approved," "Materials Ordered," "In Production," and "Quality Check" before you even get to "Shipped" or "Completed." Relying only on the defaults can make it hard to see exactly where an order is in your workflow, leading to confusion and potential delays. It’s like trying to follow a recipe with only two steps when there are actually ten.
Adding Custom Order Statuses
So, how do you actually add these new statuses? You’ve got a couple of main routes. One way is to use a plugin specifically designed for this. There are several great options out there that make it pretty straightforward to create and manage your own statuses without needing to touch any code. A plugin like WooCommerce Order Status Manager is a popular choice for this. It usually provides a user-friendly interface where you can name your new statuses, assign them colors, and even set up automatic email notifications for each one. This is generally the easiest path for most store owners.
Alternatively, if you’re comfortable with code, you can add custom statuses using PHP snippets. This involves registering a new post status and then telling WooCommerce to recognize it. While this gives you ultimate control, it’s definitely more technical and requires careful implementation to avoid breaking your site. It’s best to have a developer help with this if you’re not experienced.
Best Practices for Custom Statuses
When you start creating your own statuses, keep a few things in mind:
- Keep it Simple: Don’t go overboard with too many statuses. Aim for clarity, not complexity. Each status should represent a distinct, meaningful stage in your process.
- Use Clear Names: Make sure the names of your custom statuses are easy to understand for both you and your team. Avoid jargon or internal abbreviations that others might not get.
- Color-Code Wisely: Assigning colors to your statuses can make the orders dashboard much easier to scan. Use colors consistently to represent different types of stages (e.g., blue for active production, green for completed steps, red for issues).
- Communicate Internally: Make sure your entire team understands what each custom status means and when to apply it. Consistent use is key to accurate tracking.
- Inform Your Customers (When Appropriate): Decide which statuses you want customers to see. For example, "Shipped" is great for customers, but "Awaiting Supplier Stock" might be internal information only. Use the note feature within WooCommerce to add customer-facing details when needed.
Creating custom order statuses isn’t just about adding more labels; it’s about refining your entire order management system to better reflect how your business actually works. It helps everyone involved know exactly what’s happening with each order, reducing guesswork and improving efficiency.
Here’s a quick look at how you might map out custom statuses for a hypothetical business:
| Default Status | Custom Status Example 1 | Custom Status Example 2 |
|---|---|---|
| Pending Payment | Pending Payment | Awaiting Payment |
| Processing | Design Approval | Production Started |
| Processing | Materials Ordered | Awaiting Materials |
| Processing | In Production | Assembly |
| On Hold | Awaiting Customer Reply | Customer Feedback Pending |
| Completed | Shipped | Delivered |
| Canceled | Canceled | Order Cancelled |
| Refunded | Refunded | Return Processed |
Enhancing Customer Experience Through Order Management
Keeping your customers in the loop about their purchases is a big deal. It’s not just about sending an order confirmation; it’s about making them feel connected to their purchase from start to finish. When customers know exactly where their order is, whether it’s being packed or is already on its way, it builds trust and makes them feel valued. This kind of communication can really make a difference in how they see your brand.
Think about it: you order something online, and then… silence. It’s a bit unnerving, right? Providing regular updates, even if it’s just a quick note that their order has moved to the next stage, can prevent a lot of customer anxiety. It shows you’re on top of things and that their order matters.
Here’s how you can keep customers happy with good order management:
- Proactive Updates: Don’t wait for customers to ask. Send notifications when an order is received, being processed, shipped, and delivered. This proactive approach is key.
- Clear Status Information: Make sure your order statuses are easy to understand. Avoid internal jargon. Terms like ‘Processing’ or ‘Shipped’ are generally clear, but if you use custom statuses, explain what they mean.
- Tracking Details: Once an order ships, provide the tracking number and a link to the carrier’s website. This lets customers follow their package themselves.
- Handling Delays: If there’s a delay, inform the customer immediately. Explain the reason briefly and give an updated estimated delivery time. Honesty goes a long way.
Good communication about order status isn’t just a nice-to-have; it’s a core part of the customer experience. It directly impacts repeat business and how customers talk about your store to others. Getting this right means fewer support queries and happier shoppers.
Managing orders efficiently also means your business runs smoother. When you have a clear system for processing and shipping, you can get products out the door faster. This speed, combined with good communication, really makes customers feel like they’re getting great service. It’s all about making the entire process, from clicking ‘buy’ to receiving the package, as pleasant as possible. For more on managing your sales, check out WooCommerce order management .
Troubleshooting Common Order Status Issues
Sometimes, things just don’t go as planned with orders in your WooCommerce store. It’s not the end of the world, but it can be a headache. Let’s look at some common hiccups and how to sort them out.
Identifying and Resolving Order Status Errors
Ever notice an order stuck in ‘Pending Payment’ when it should be ‘Processing’, or maybe it’s just not updating at all? This can happen for a few reasons. First, double-check your payment gateway settings. Make sure everything is connected properly and that there aren’t any error messages from the gateway itself. Sometimes, a simple misconfiguration is the culprit. Another common issue is plugin conflicts. If you recently added a new plugin or updated an existing one, it might be messing with how order statuses are handled. Try deactivating plugins one by one to see if the problem goes away. If it does, you’ve found your troublemaker.
Don’t forget to check your server logs too. Weird errors can pop up there that might be preventing orders from moving through the system correctly.
Addressing Missing Orders
This is a big one: customers swear they placed an order, but it’s nowhere to be found in your dashboard. Before panicking, check your payment gateway’s transaction history. Did the payment actually go through? Sometimes, a failed payment attempt might not create a full order record. Also, look at your site’s error logs. If there was a server hiccup during checkout, the order might have just vanished into the digital ether. It’s also worth checking if your payment gateway is set up to send confirmation back to WooCommerce properly.
Preventing and Managing Failed Payments
Failed payments are frustrating for everyone. For the customer, it means they can’t buy what they want. For you, it means a lost sale and a potential support ticket. First, make sure your payment gateway plugins are up-to-date and compatible with your current WooCommerce version. Outdated plugins are a frequent source of payment problems. Also, verify that your API keys and credentials with the payment provider are still valid. Sometimes these expire or need to be re-entered. If you’re seeing a lot of failed payments, it might be worth testing different payment methods yourself to see if there’s a pattern. Maybe one specific card type is causing issues, or perhaps there’s a problem with your SSL certificate that’s making customers hesitant.
Wrapping Up Your Order Management
So, we’ve gone over how to keep track of everything coming in and going out of your store. Knowing what each order status means and how to update them is pretty important for keeping customers happy and your business running smoothly. It might seem like a lot at first, but once you get the hang of it, managing orders in WooCommerce becomes second nature. Just remember to check your orders regularly, update statuses as needed, and communicate with your customers. Doing this will really help your online shop do well.
Frequently Asked Questions
How can I view all my orders in WooCommerce?
To see all your orders, go to your WordPress admin area and click on “WooCommerce,” then “Orders.” You’ll see a list of every order. You can sort them by date, search for a specific customer, or filter them by their status, like “Processing” or “Completed.”
How do I change an order’s status?
Sure! To change an order’s status, find the order on the “Orders” page. Click “Edit” next to it. On the order details page, you’ll see a dropdown menu where you can pick a new status, like “Processing” or “Completed.” Just remember to hit “Update” to save your change.
What are the standard order statuses in WooCommerce?
WooCommerce has default statuses like “Pending Payment,” “Processing,” “On Hold,” “Completed,” “Canceled,” “Refunded,” and “Failed.” These help you know where each order is in the process, from when it’s placed to when it’s delivered.
Can I create my own order statuses?
Yes, you can add your own custom statuses! If the default ones don’t quite fit your workflow, you can add new ones like “Awaiting Assembly” or “Ready for Pickup.” This helps you track orders even more precisely.
How can I keep customers updated about their orders?
Keeping customers informed is super important! You can do this by sending them emails when their order status changes. For example, let them know when their order is “Processing” or “Shipped.” This makes them feel confident and reduces their need to ask you for updates.
What should I do if orders are missing from my dashboard?
If orders aren’t showing up, first check if your payment methods are set up correctly. Sometimes, payment problems can stop orders from appearing. Also, look at your website’s error logs and your payment gateway’s logs for any clues. Plugin conflicts can also cause issues, so try turning off other plugins one by one to see if that fixes it.
