Mastering Ghost Mannequin Photography: Elevate Your Product Shots
- Date
Want to make your clothing look amazing online without hiring models or dealing with complicated shoots? You’re in the right place. We’re talking about ghost mannequin photography, a super useful trick for making your products pop. It makes clothes look like they’re floating, showing off the fit and style perfectly. It’s a smart way to get professional-looking shots that grab attention and help people buy.
Key Takeaways
- Ghost mannequin photography makes clothes look like they’re worn by an invisible person, showing fit and drape without a visible model.
- This method saves money by cutting out the need for models and simplifies shoots.
- Using the right mannequin, lighting, and camera angles is key to getting good results.
- Post-processing is important for removing the mannequin and making the garment look natural.
- Combining ghost mannequin shots with other styles, like close-ups, gives customers a complete view of the product.
Understanding The Ghost Mannequin Effect
The ghost mannequin effect, sometimes called the invisible mannequin technique, is a pretty neat trick for showing off clothes online. Basically, you photograph a piece of clothing on a mannequin, and then in editing, you digitally remove the mannequin itself. What’s left is just the garment, looking like it’s floating or being worn by someone invisible. It’s a way to get that modeled look without needing a real person, which can save a lot of hassle and money.
What Is The Ghost Mannequin Effect?
At its core, the ghost mannequin effect is a post-production technique. You shoot a garment on a mannequin, and then you carefully edit out the mannequin. The goal is to make the clothing look like it’s naturally draped and fitted, as if someone is wearing it, but without any visible person or form. This gives customers a clear view of the item’s shape and how it hangs, which is super helpful when they’re shopping online. It’s a popular method for fashion e-commerce because it keeps the focus squarely on the product.
Benefits Of Using The Ghost Mannequin Effect
There are quite a few good reasons why people use this method. For starters, it’s a lot cheaper than hiring models for every single product. You also get a really consistent look across all your product photos, which makes your online store look more professional and put-together. Plus, it shows the clothes better than just laying them flat; you can actually see how the fabric drapes and fits. It cuts down on distractions, so shoppers aren’t looking at the model’s face or hair, just the clothes. It’s also easier to manage if you have a lot of items to photograph, making your whole process quicker.
Ghost Mannequin Photography vs. Traditional Methods
Compared to traditional methods, ghost mannequin photography offers a unique blend of benefits. Flat lays are simple but don’t show how a garment fits or drapes. Full model shoots show fit and drape well, but they can be expensive, time-consuming, and introduce distractions like model styling or background elements. The ghost mannequin effect bridges this gap. It provides the dimensional appeal of a modeled garment while maintaining the clean, product-focused aesthetic often desired in e-commerce. This approach helps customers visualize the fit and form of the clothing without the variables that come with a live model. You can find some great editing tips for this effect here .
| Feature | Ghost Mannequin Effect | Flat Lay Photography | Model Photography |
|---|---|---|---|
| Shows Fit & Drape | High | Low | High |
| Cost | Medium | Low | High |
| Focus on Product | High | High | Medium |
| Production Speed | Medium | High | Low |
| Visual Consistency | High | High | Medium |
Essential Equipment For Ghost Mannequin Photography
Getting the right gear is half the battle when you’re aiming for that clean, professional ghost mannequin look. You don’t need a Hollywood studio, but a few key pieces make a world of difference.
Choosing The Right Mannequin Or Form
Picking your mannequin or dress form is pretty important. Think about who you’re selling to. A realistic mannequin might work for some brands, but often, a simple, clean dress form is better. White, matte finishes are usually best because they don’t reflect light too much, which makes editing way easier later on. Look for ones that have removable parts, like the neck or arms. This is super handy for getting those shots of the inside of the collar or sleeves, which you’ll need for the final effect. Having a couple of different sizes can also be a good idea if your clothing line varies a lot.
Camera And Lens Selection
While you can technically use a smartphone, a DSLR or mirrorless camera gives you a lot more control. You’ll want something with manual settings so you can keep everything consistent shot to shot. For lenses, a 50mm or 85mm is usually a safe bet. These focal lengths give you a natural perspective, meaning the clothes won’t look stretched or squished, which is a big help when you’re editing. It’s worth investing in a decent camera for your product shots.
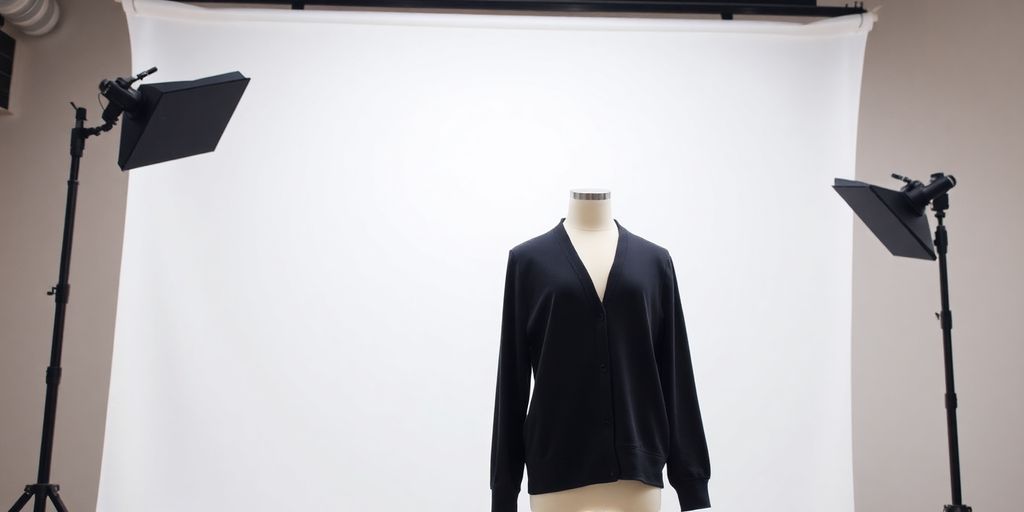
Mastering Lighting Setups
Lighting is where the magic really happens, or doesn’t, if you get it wrong. For ghost mannequin shots, you want even, soft light. Harsh shadows are your enemy here. A common setup is using three lights: a main light (key light) to illuminate the garment, a fill light to soften any shadows the key light creates, and a background light to keep your backdrop nice and clean. Softboxes are great for diffusing light and making it look soft and even. Getting this right means less work in post-processing. You can find good lighting kits that won’t break the bank, making professional-looking shots achievable.
Good lighting makes your product pop and makes the editing process much smoother. It’s all about creating a consistent look that customers can trust.
Here’s a quick rundown of what you might need:
- Mannequin/Dress Form: Preferably white and matte, with removable parts.
- Camera: DSLR or mirrorless with manual controls.
- Lens: 50mm or 85mm prime lens.
- Lighting: At least two softbox lights or continuous LED panels.
- Tripod: To keep your camera perfectly still.
- Backdrop: White seamless paper or fabric.
- Clips/Pins: For garment styling.
| Equipment Type | Recommended Specification |
|---|---|
| Camera Body | DSLR or Mirrorless |
| Lens | 50mm or 85mm |
| Lighting | Softboxes/LED Panels |
| Tripod | Sturdy and stable |
Setting Up Your Photography Environment
Setting up your photography space right is pretty important for getting those clean, professional-looking shots. You want a background that’s simple, so the focus stays on the clothes. Think white, light grey, or even a subtle texture, but nothing too busy that distracts the eye. A clean, consistent background makes editing way easier later on.
When you’re figuring out where to shoot, make sure you have enough room to move around the mannequin and your camera. You don’t want to feel cramped. It’s also a good idea to mark where your tripod and mannequin stand so you can put them back in the exact same spot for every shot. This consistency is key for when you start editing.
Getting the lighting right is another big piece of the puzzle. You want the light to be even across the garment, avoiding harsh shadows that can be a pain to remove. Natural light is great if you have a big window, but if not, you might need to set up some lights. Softboxes or diffusers can help spread the light out nicely. If you’re using natural light, try to have it come from the same direction as your camera lens, not directly at it.
Creating a Clean and Consistent Background
For ghost mannequin shots, a plain background is your best friend. It makes removing the mannequin or any background elements super simple. A white or light grey seamless paper roll works wonders, or even just a clean, un-cluttered wall. If your wall isn’t perfect, you can always use editing software to clean it up, but starting with a good base saves a lot of time.
Optimizing Space For Your Shoot
Think about the flow of your shoot. Having enough space to walk around the mannequin, adjust the clothing, and move your camera is important. If you’re using a tripod, make sure you have a stable spot for it. Marking the floor with tape for your tripod and mannequin can really help keep things consistent between shots, which is a lifesaver during editing. This is especially helpful if you’re trying out different angles or need to capture details from various positions.
Achieving Even Illumination
Even lighting is what makes the ghost mannequin effect look so polished. You want to light the garment from the front, ideally with the light source coming from the same direction as the camera. Using two lights, one on each side, can help reduce shadows. If you only have one light, a reflector placed opposite the light can bounce some light back onto the garment, filling in those darker areas. Soft, diffused light is generally better than harsh, direct light. You can achieve this with softboxes or by bouncing your lights off a white surface. This careful lighting setup helps create a natural look for the clothing, making it appear as if it’s floating. It’s a bit like hybrid photography , where you’re creating a specific visual effect through careful setup and editing.
Capturing Your Product Images
Now that you’ve got your setup sorted, it’s time to actually take the pictures. This is where the magic starts to happen, turning a simple garment into a product ready for online shoppers. Getting this right means your product photos will look polished and professional, making customers feel more confident about their purchase.
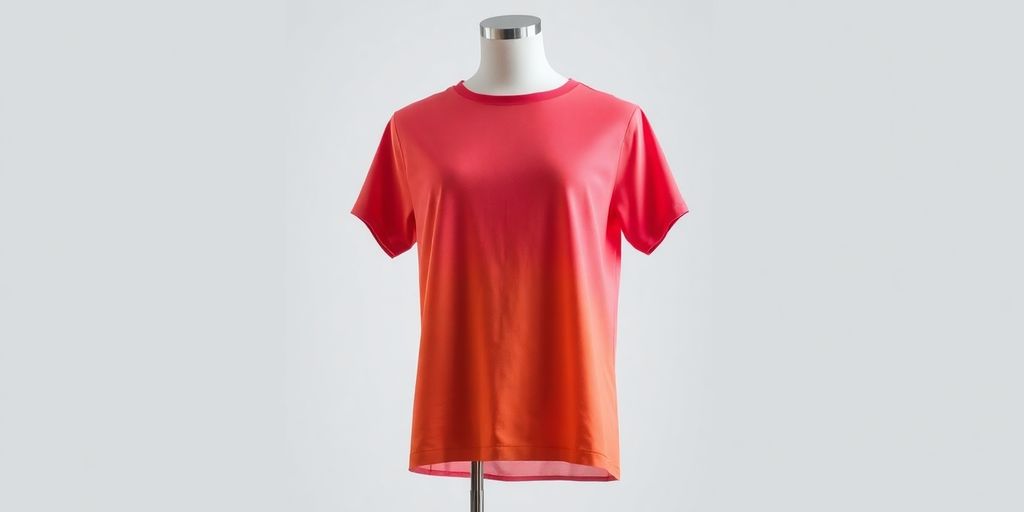
Styling Garments For The Perfect Fit
Getting the clothes to look just right on the mannequin or form is a big part of the process. You want the fabric to hang naturally, without awkward wrinkles or bulges. Think about how the garment would look on a person. Sometimes, a little bit of double-sided tape or a few strategically placed pins on the inside of the garment can help smooth out fabric or keep a collar in place. It’s all about making the clothing look its best, as if it’s being worn, even without a person there. This attention to detail really makes a difference in the final look.
Camera Angles For Flattering Shots
Choosing the right camera angles is key to showing off your product effectively. You don’t want to just shoot straight on all the time. Try a slightly lower angle to make the garment look more imposing, or a slightly higher angle to give a sense of perspective. Getting a variety of angles helps customers see the product from all sides, just like they would in a store. Think about what features you want to highlight – maybe it’s the drape of a skirt or the fit of a jacket. Experimenting with different viewpoints will help you find what works best for each item. A good rule of thumb is to capture the front, back, and sides.
Capturing Multiple Views And Details
Customers want to see everything about a product before they buy it. So, after you get your main shots, don’t forget the details. This means taking close-ups of things like stitching, buttons, zippers, or any unique patterns. If the garment has a cool label on the inside or a special seam, get a shot of that too. You might even want to take a picture of the garment laid flat, inside out, to show the construction or any tags. This extra effort gives shoppers a complete picture and builds trust. It’s like giving them a virtual try-on experience. You can even use these flat-lay shots later to fill in gaps when you remove the mannequin, like showing the inside of a neckline. For a more complete product display, consider complementary pieces that work well with your main item.
Remember that consistency is important. If you decide to use a specific lighting setup or background for one product, try to stick with it for all your products. This makes your online store look more organized and professional, which can really help with customer trust and sales.
Post-Processing For The Invisible Mannequin Look
Essential Editing Techniques
Post-processing is where the magic happens for the ghost mannequin look. You’ll want to get comfortable with software like Photoshop. The main goal here is to remove the mannequin cleanly while making the garment look like it’s floating. This usually involves using selection tools to carefully cut out the mannequin. You’ll also need to pay attention to the inside of the garment, especially around the neck and sleeves, to make sure it looks natural. Think about adding subtle shadows inside the garment to give it some depth, making it appear less flat. It’s all about making the clothing look its best without any distractions.
Masking and Layering For The Effect
Masking and layering are your best friends in this process. After you’ve taken your shots, you’ll bring them into your editing software. You’ll likely have one shot of the garment on the mannequin and another shot of the inside of the garment (like the collar or sleeve opening). You’ll use layer masks to carefully hide the mannequin in the main shot and then bring in the details from the interior shot. This layering technique lets you build up the final image piece by piece. It’s a bit like putting a puzzle together, but with pixels. Getting these layers to blend smoothly is key to making the effect look believable. You can find some great tutorials on photo retouching to help you master these skills.
Adding Depth And Realism
To really sell the ghost mannequin effect, you need to add a touch of realism. This often means creating subtle shadows and highlights within the garment itself. For example, where a collar would naturally fold, or inside a sleeve, a little bit of shadow can make it look like the garment has real dimension. You might also need to adjust the colors slightly to make sure they’re accurate and vibrant. Sometimes, you might even need to composite parts from different shots to get the perfect look, especially for tricky areas like sleeves or hoods. The aim is to make the clothing appear as if it’s being worn, even though there’s no one there.
Overcoming Common Ghost Mannequin Challenges
Even with the best intentions, you might run into a few snags when shooting for that invisible mannequin look. It’s not always as straightforward as it seems, but most issues have pretty simple fixes.
Dealing With Reflective Materials
Shiny fabrics or materials can be a real pain. They tend to pick up the dark bits of your studio, making the product look dull or even black. The trick here is all about the lights. Try using big, soft light sources and get them closer to the mannequin. This helps spread the light out evenly, cutting down on those harsh reflections and letting the material’s natural shine come through. It takes a bit of fiddling, but it makes a huge difference.
Ensuring Consistent Lighting
This is super important, especially if you’re shooting a bunch of items. If your lighting changes even a little bit from one shot to the next, it makes post-processing a nightmare. You want the light hitting the garment to be exactly the same every time. Keep your camera, lights, and settings locked down once you find what works for a particular item. This consistency is key for that smooth, professional look and makes editing much easier. It’s worth spending a bit more time getting it right in-camera.
Achieving the Perfect Garment Fit
Getting the clothes to look just right on the form is another common hurdle. If the garment is too tight or too baggy, it just won’t look natural. You’ll want to have a few tricks up your sleeve for this. Having a variety of pins, clips, and even some double-sided tape can help you subtly adjust the fit. Think about how the clothing would actually hang on a person. Sometimes, you might need to shoot a few different angles or even use a different sized form to get that ideal drape. It’s all about making the garment look its best, not the mannequin.
Sometimes, the simplest solutions are the best. Don’t overcomplicate things if a few well-placed pins can do the job. The goal is a natural look that highlights the product.
Elevating Your E-commerce Visuals
Integrating Ghost Mannequin Shots With Other Styles
While ghost mannequin shots are great for showing how a garment hangs and fits, they can sometimes feel a bit static. To really bring your products to life and give shoppers a complete picture, it’s smart to mix them with other types of photos. Think about adding close-ups that really show off the fabric texture or stitching. Lifestyle shots, where someone is actually wearing the clothes in a natural setting, can also help customers imagine themselves in the outfit. This combination builds more confidence in shoppers and helps them get a better feel for your brand.
Maintaining Brand Consistency
Keeping your product photos looking similar across your entire online store is super important. When your images have a consistent background, style, and quality, your shop just feels more professional and easier to look through. This consistency helps build trust with your customers. It shows you pay attention to detail and care about how your products are presented. Stick to a clear style guide for your ghost mannequin shots and any other photos you use.
Streamlining Your Workflow
Once you’ve got the hang of ghost mannequin photography, it can actually save you a good chunk of time and money compared to doing full model shoots. It’s a really repeatable way to get polished photos, especially if you need to shoot a lot of items. But remember, even with ghost mannequin shots, you still need to think about how they fit into your overall marketing. Making sure your image files are named clearly, adding alt-text for search engines, and keeping file sizes down are small steps that make a big difference in how well your products get found online. You can even use services for ghost mannequin neck joint to perfect the look. By blending different photo styles and keeping your workflow efficient, you can present your products in a way that attracts more buyers and helps your business grow.
Wrapping Up Your Ghost Mannequin Journey
So, there you have it. We’ve gone through how to get those clean, professional-looking product shots using the ghost mannequin technique. It really makes your clothes pop online without needing a whole photo studio or a professional model. Remember, it’s all about getting the fit right on the mannequin, using good lighting, and then doing a bit of editing to make the mannequin disappear. Don’t be afraid to practice; the more you do it, the better and faster you’ll get. Plus, mixing these shots with close-ups or lifestyle photos can really give customers a better idea of what they’re buying. Give these tips a try, and you should see a nice difference in how your products look and hopefully, how well they sell.
Frequently Asked Questions
What exactly is the ghost mannequin effect?
The ghost mannequin effect is like a magic trick for photos! It’s when you take a picture of clothes on a mannequin, but then you edit the photo so the mannequin disappears. This makes the clothes look like they’re floating or being worn by someone invisible, showing off how the clothes fit and look without a real person or the mannequin in the way.
Why should I use the ghost mannequin effect for my products?
Using this effect is super helpful because it makes your clothes look really professional in online stores. It shows customers exactly how the outfit will hang and fit, which helps them decide to buy. Plus, you don’t need to hire expensive models or deal with complicated photo shoots, saving you time and money.
What basic equipment do I need to try this?
You don’t need fancy gear to start! A smartphone with a good camera is a great beginning. You’ll also need good lighting – natural light from a window works well. A simple tripod or even a stack of books to hold your phone steady is useful. For the clothes, you can use a mannequin, a friend, or even yourself!
How do I make the clothes look good on the mannequin?
Getting the clothes to fit just right is key. Make sure the clothes aren’t too tight or too baggy on the mannequin. Sometimes, using pins or clips carefully hidden from the camera can help make the outfit look smoother and more natural. Ironing or steaming the clothes first also makes a big difference!
What if my clothes are shiny or have tricky materials?
The trickiest part can be making shiny or dark clothes look right, as they can reflect unwanted shadows. The best way to handle this is with good lighting. Using big, soft lights placed close to the clothes can help make them look even and bright, showing off their real color and texture without dark spots.
How can I make my product photos even better?
Ghost mannequin photos are great for showing how clothes fit, but they can sometimes feel a bit plain. To make your online shop more exciting, mix these photos with other kinds, like close-ups that show fabric details or pictures that show the whole outfit in a lifestyle setting. This gives shoppers a more complete idea of your product.
